

The Ultimate Git and GitHub Developer Guide
Get Started Using Git and GitHub Today


Table of contents
- What is Git?
- What is GitHub?
- Git Workflow 🎃
- Heads Up to Open Source 🙌
- Git cheatsheet 🗒️
- Hands-on resources 📒
- Do's ✅ & Dont's ❎ While Making Contributions
- Benefits of Contributing To Open Source Projects
- Open Source Programs
- Open Source Communities
- Hope this helps you. Thank you for reading, and let's connect!
Hello everyone! Hope you're doing well. Today we'll learn about Git and GitHub basics and try to deep dive into it. So, what are you waiting for? 😏

More or less I hope that you all have heard about Git/GitHub at least once in your lifetime after you got into tech. Let's see its origin and its basics along with use cases.
What is Git?
Git is a version-control system by which you can track your project state/condition. It was originally authored by Linus Torvalds in 2005 for the development of the Linux kernel, with other kernel developers contributing to its initial development.
A quick story behind it is Linus Torvalds was developing Linux Kernel along with his team and at that time it was tough to track the tasks of each person at the same time and they had to face various problems. Although BitKeeper (similar to Git) existed at that time but it wasn't free to use and has some limitations. Linus wanted a free distributed version control system which gave birth to Git.
According to Wikipedia:
Git is a free and open source software for distributed version control: tracking changes in any set of files, usually used for coordinating work among programmers collaboratively developing source code during software development.
Here some of the terms might be tricky for you which is completely fine if you are a beginner. Let me explain things one by one.

Open Source software
Open Source software in simple terms means a software/project whose source code is open and accessible to everyone on the internet no matter if the project is small, tiny, or big. These kinds of projects are uploaded on some platforms like GitHub, GitLab, Bitbucket, etc., by the owner of the project or by the organization.
Some of the popular Open Source Software are:
- GNU/Linux
- Mozilla Firefox
- VLC media player
- SugarCRM
- GIMP
- VNC
- Apache web server
- LibreOffice
Version Control
Version Control is the process of tracking your source code of a project after every commit.
Let's say that you're painting something like the below image and committed a mistake.

Now, can you revert to that version of your painting before you committed the mistake?
You obviously cannot do that. But using Git while developing a project, it's possible. Here comes, Git commands in handy. We'll learn about those commands later on in this article.
Still, having confusion about version control? 🤔
Check out the following video.
What is GitHub?
GitHub is a cloud-based hosting service that lets you manage Git repositories. Either way, you may call it a platform that hosts thousands and thousands of Open Source Projects/Repositories where every repository has lots of files and folders in it required that particular project. You may think of a repository as a folder containing all other files in it.
You get to know a lot of developers around the world and collaborate with them, connecting on their socials via contributing to each others' open-source projects.
Git Workflow 🎃
A basic git workflow looks like this:
- Fork repository
- Clone repository
- Create a new branch
- Make Changes
- Fetch for Incoming Changes
- Stage and Commit New Changes
- Create a Pull Request
We often follow these simple steps to make a contribution to Open Source projects on GitHub. Hold on, we'll get to know all about them sooner.
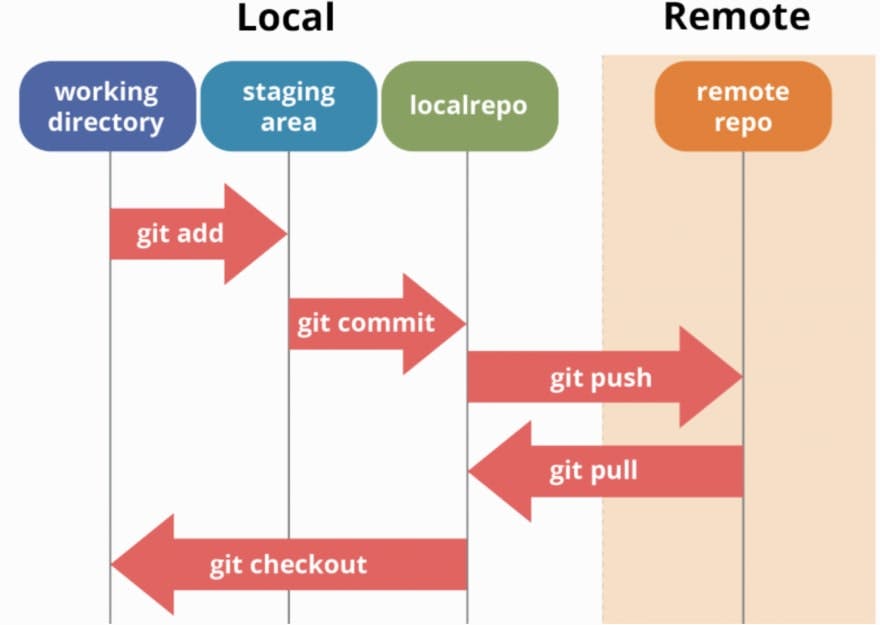 Fig: Git Workflow Diagram Source: Google
Heads Up to Open Source 🙌
By now we have got through lots of learnings just by reading. I know you're feeling bored now. So, let's do something hands-on and get our energy back.

We'll start from the basics like setting up Git and forking a repository(repo in short) and then making a simple contribution to that particular repo.
Prerequisities:
- You must have downloaded and installed Git according to your system(Windows, Linux or Mac)
- You must have a GitHub account.
- You should have a code editor like Visual Studio Code installed on your system.
Next, we'll set up Git locally by logging in within the Git Bash by using the following commands.
- Setup Git username
git config --global user.name "Susmita-Dey" - Setup Git email
git config --global user.email "test@gmail.com" - Cache the login credentials in Git Bash
git config --global credential.helper cache
Now first thing first, you should have a repo with your GitHub username on your GitHub account. This will be known as a special repository that will represent your GitHub profile.
As an example, check out my GitHub profile repo with my username Susmita-Dey.
If you want to customize your GitHub profile like me, then you make check this course of Eddie Jaoude on "How to customize your GitHub Profile"
So, now let's move on to searching for some good first repositories to start with.
Resources to Find Good First Issues/Beginner-Friendly Repos 📃
- goodfirstissue.dev
- finder.eddiehub.io
- up-for-grabs.net/#
- githubindia.com
- goodfirstissues.com
- github.com/topics/good-first-issue
- firstcontributions.github.io
You'll come across a lot of beginner-friendly open-source projects on the above websites and choose one by one among them to start making your contribution.
Making Contribution To an Open Source Project 🤝
As an example, I'm taking up one of my organization's repositories to show you how to contribute to an open-source project.
Repository link:- github.com/opensourcecommunity-hub/Contribu..
Note: Before moving on to further steps, for other than this kind of getting-started repositories, kindly find issues/features/bugs in that project which you could improve by making contributions.
- Forking Repository
Now head over to the repository and first of all, we'll fork them to our account. Here forking repository means creating a copy of the original repository on my account.
We can do it after going to the repository and then clicking on the fork symbol at the top right corner.

- Cloning Repository
Click on the Code button and a window will open up as in the following image.
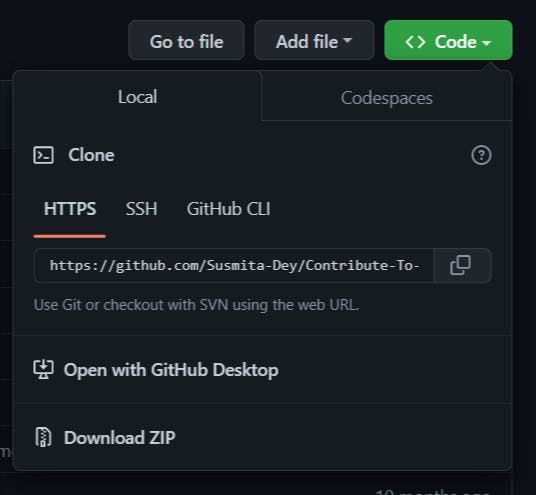
Here I prefer using an HTTPS link but you may go with SSH or GitHub CLI tools. Now copy the link using the copy icon and it's time to open up Git bash on your local system. Put the following command in your Git bash. You may also use any other terminal window (Command Prompt, Powershell, Terminal, Bash, ZSH) alternatively to do the same work.
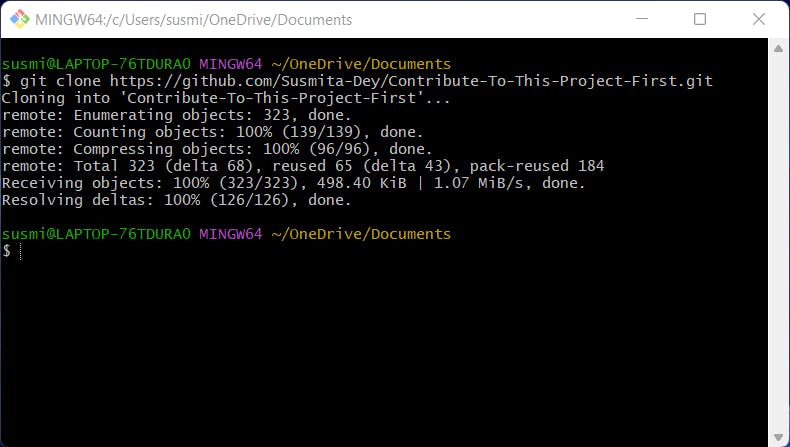
git clone https://github.com/YOUR_GITHUB_USERNAME/Contribute-To-This-Project-First.git
Here in the place of YOUR_GITHUB_USERNAME put your GitHub username and then hit Enter on your keyboard. Wait for some time and you'll see something like the image below.
- Create a new branch
Now before creating a new branch we have to enter that folder and add upstream. Now in your terminal, type this command and hit enter.
  cd Contribute-To-This-Project-First
git remote add upstream https://github.com/Susmita-Dey/Contribute-To-This-Project-First.git
Here the upstream command is required to pull in changes from the main repo directly into our local repository.
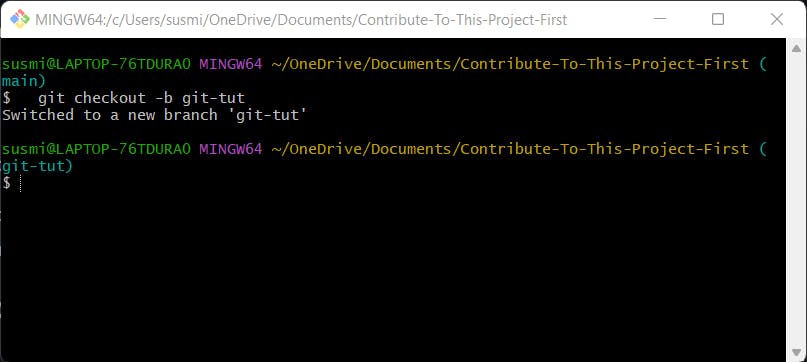
Now use the following command to create a new branch.
git checkout -b <name-of-new-branch>
Here instead of <name-of-new-branch> you may give any name of your choice such as typo-fix, Name-patch-1, etc. Your username would make a good branch because it's unique.
As an example, I have done this.
💡Important: I guess many of you are thinking that why creating a new branch is required as we can work on the default
mainbranch itself. So, here's why. Branches isolate your development work from other branches in the repository. For example, you could use a branch to develop a new feature or fix a bug. You always create a branch from an existing branch. Typically, you might create a branch from the default branch of your repository. You can track your changes while developing using various branches.
If you want to know more about this topic, then you should learn about Git Branching Strategies. Take this tutorial guide as a reference.
- Make Changes
Now we have switched to a new branch from the main branch, we'll make some changes. Before this one important task is to be done i.e., fetching upstream to keep track of the incoming changes and merge them into our repository. The following command will help you to do so.
git fetch upstream
git merge upstream/main
Alternatively method:
git pull
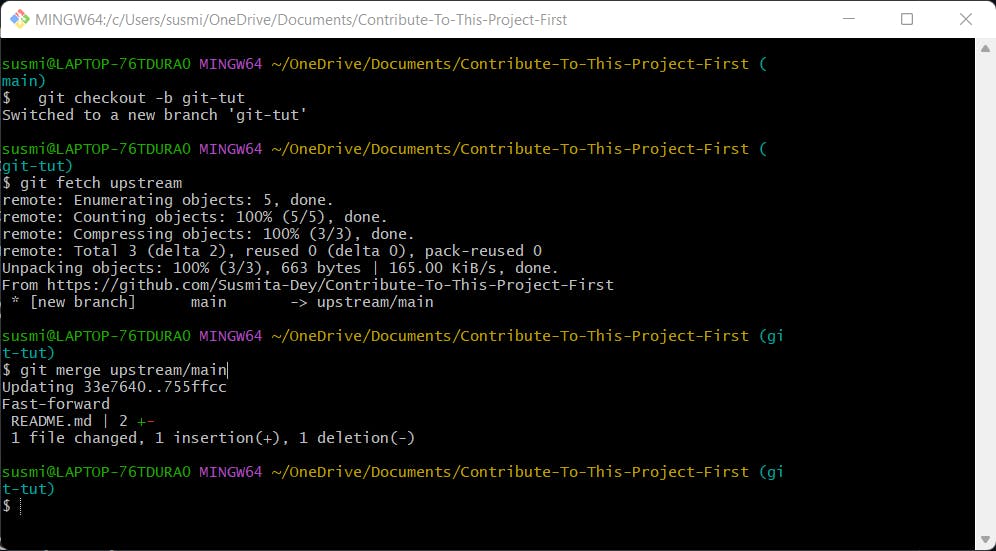
As you can see, here a change has been made in the original repository and we have pulled and merged those changes locally.
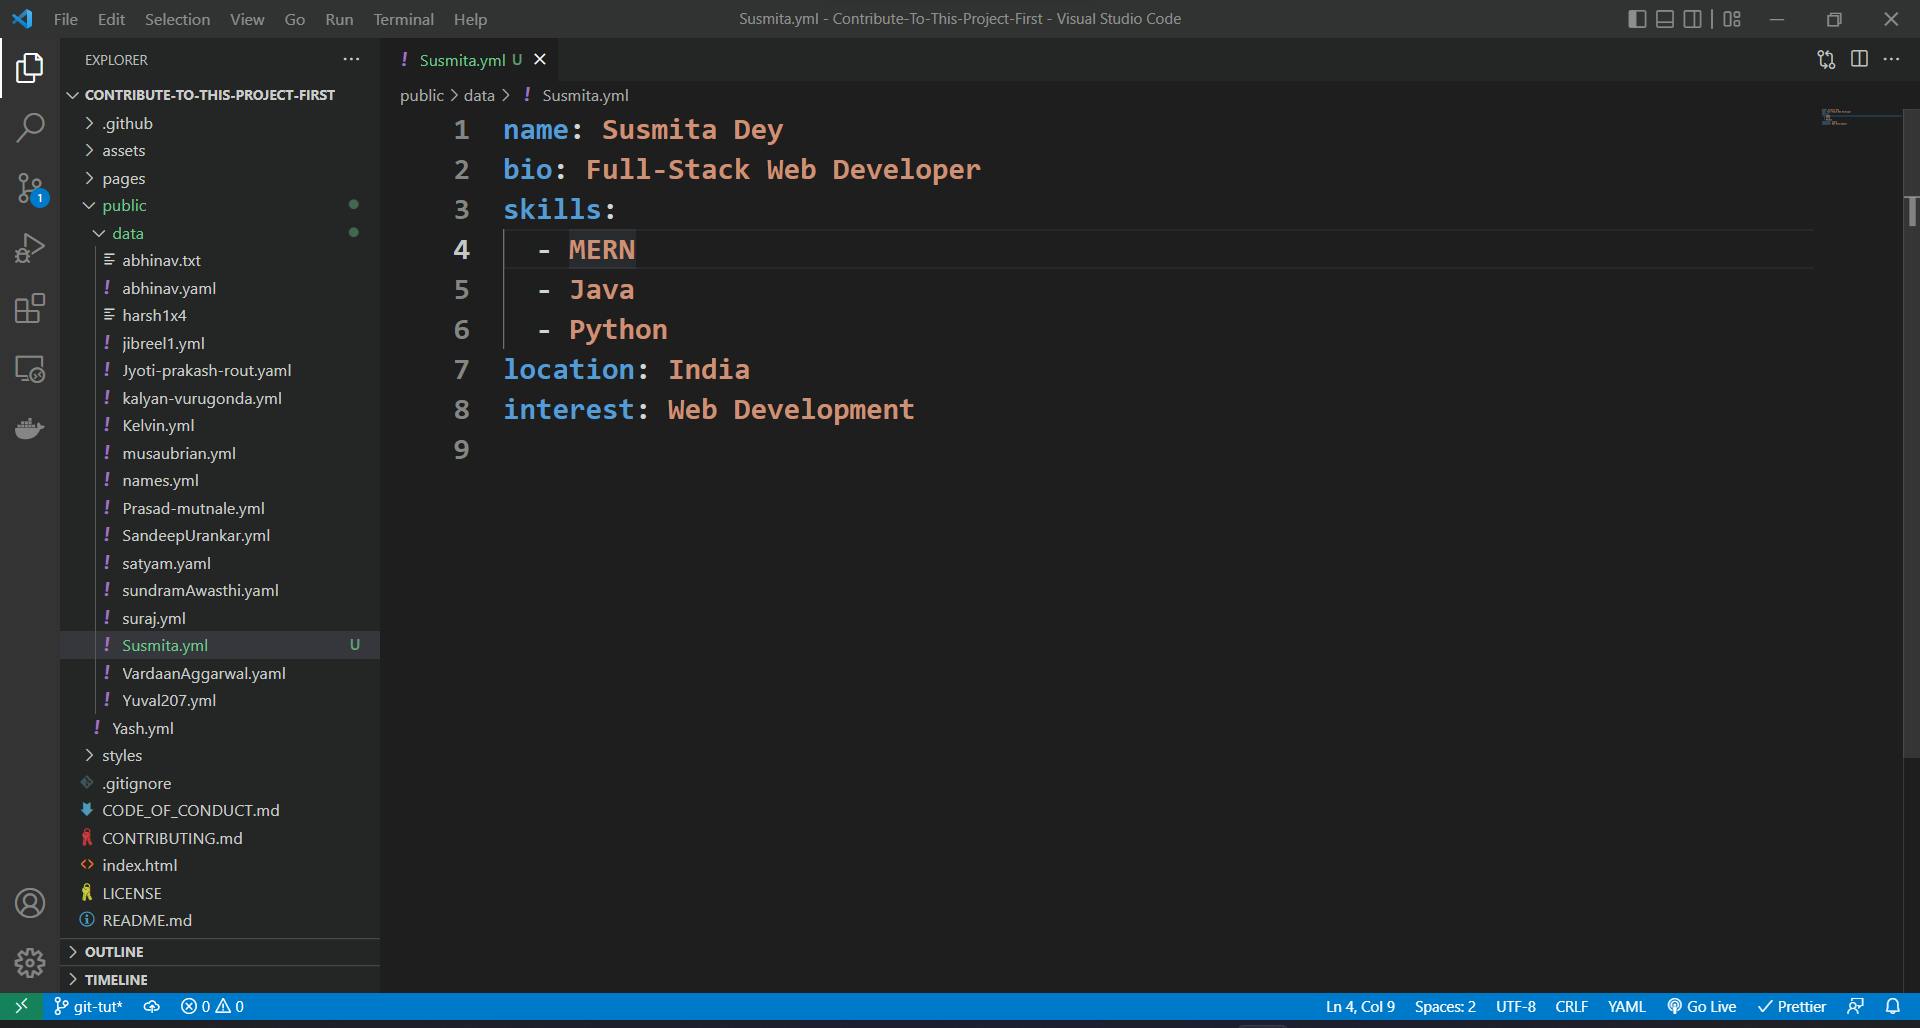
Now without closing your terminal, open up this folder in your favorite code editor or IDE. I'll be using Visual Studio Code here. Now, this is my current folder structure.

Inside the public/data folder, I'll be creating a new file as Susmita.yml and you'll be putting your name instead of mine. Now, in this file just copy the following syntax and make the changes and save the file.
name: Martin Developers
bio: Software Developer
skills:
- Python
- Perl
- pascal
location: India
interest: Web Development
I have done something like this:
- Fetch for Incoming Changes
Before committing and updating our forked repository, we should always fetch for incoming changes to avoid merge conflicts.
git fetch upstream
git merge upstream/main
You might be thinking what the hell is this merge conflict now? 🤔
You could think of a fight between incoming changes and the changes you made as if both are fighting to get the first place in the repository.
This article by freecodecamp will help you to learn about merge conflicts and the ways to face them if any happen in the near future.
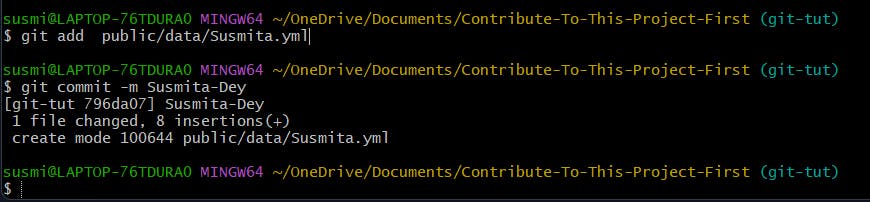
- Stage and Commit New Changes
Let's go back to our terminal and run the following commands.
git add public/data/Susmita.yml
Note that I'm adding my file with my name and you should use your file name instead of Susmita.yml
Let's commit our changes.
git commit -m "Add <your-github-username>"
Here give your username instead of <your-github-username>.
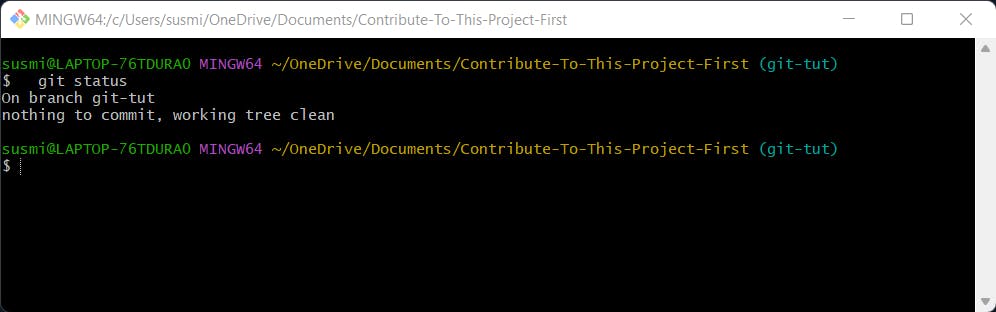
Now, check the status of your repository.
git status
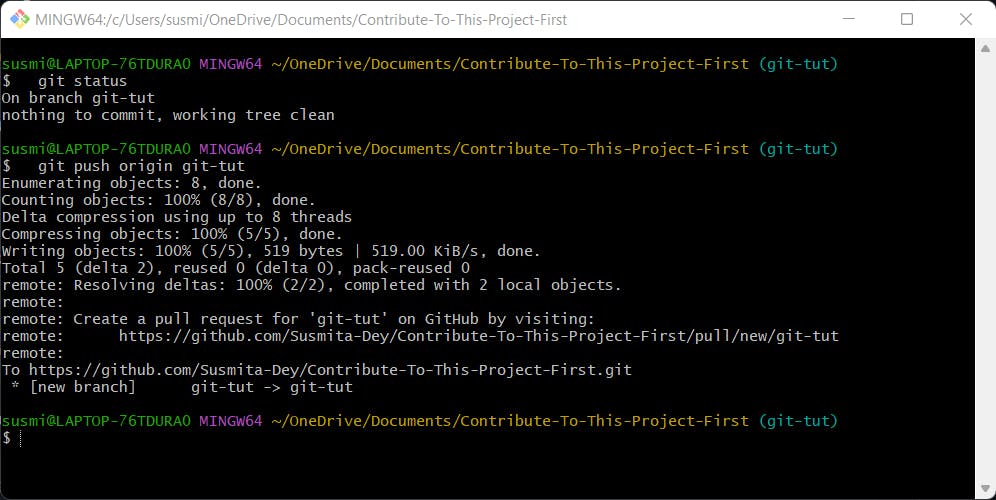
It's time to push our changes to our forked GitHub repository.
git push origin <name-of-your-branch>
Here instead of <name-of-your-branch>, you'll give the branch name you're working on till now. For my reference, I've used git-tut and you can see the output as in the following image.
- Create a Pull Request
Now head over to your forked repository and you may something like the following image. For mine, it's showing my branch name git-tut. It could be something else for you.

Now click on the Compare & Pull Request button and you may see something like this.
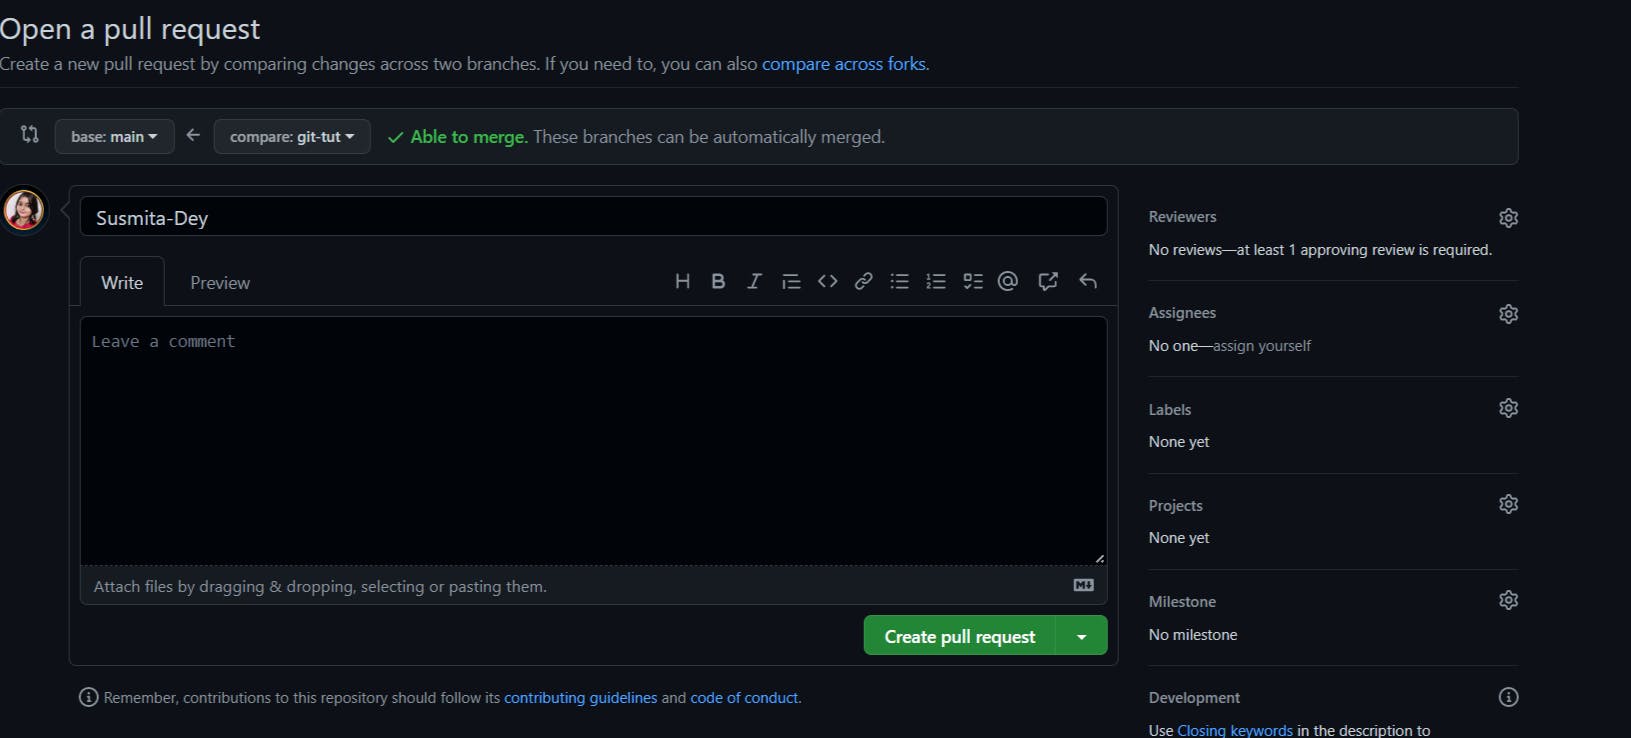
Here, add your commit message at the top and write some comments in the larger box about the changes you made and click on the Create Pull Request button. You should wait for some days to get your PR reviewed by the project maintainer and merged.
Here's a complete guide on "How to write Good Commit messages and Pull Requests Best Practices". This will help you to learn the perfect way of writing good commits and code reviews.
Note: The maintainer might ask you to make some required changes in your PR. In that case, you have to make those changes first and make your PR ready to be reviewed again and merged.
After it gets merged, it will show up like this:

Let's have party 🥳🎈🎉🎊 Congratulations on getting your first PR merged.

Git cheatsheet 🗒️
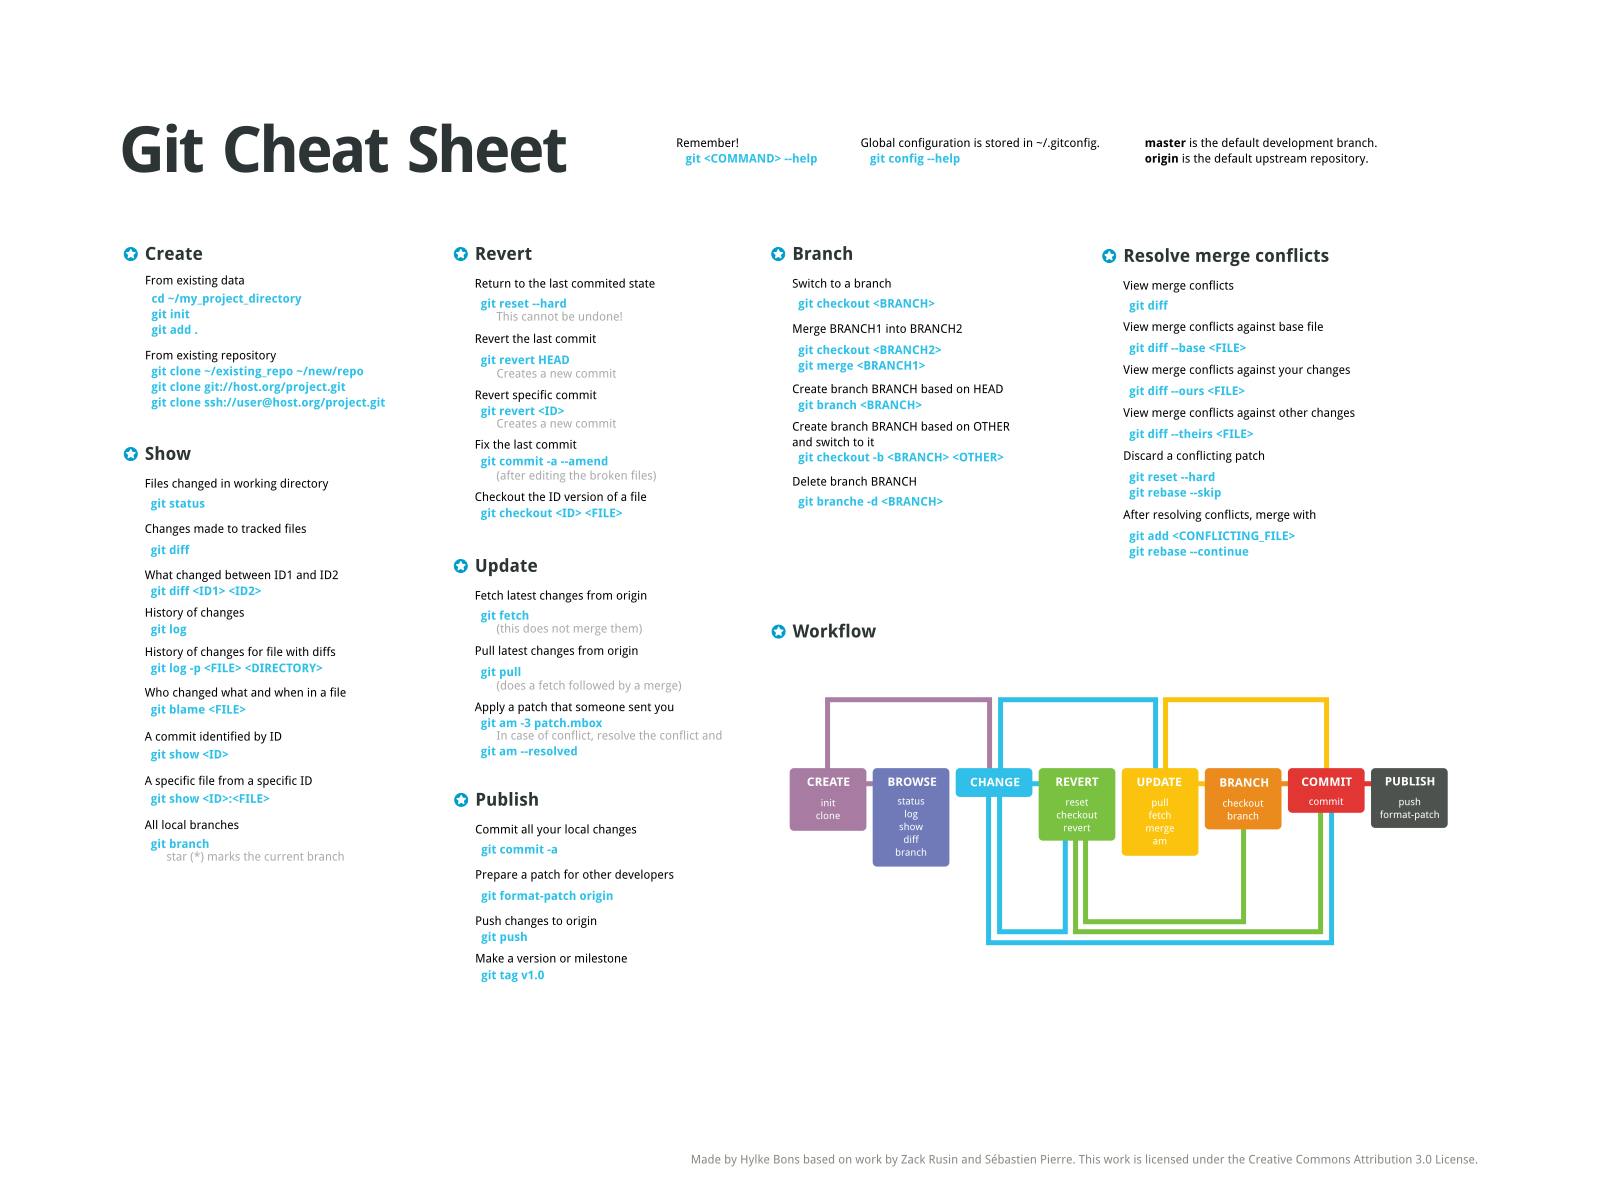
A cheat sheet full of git commands always comes in handy. So, here I have shared an image with you. Alternatively, you may download the PDF version of the Git cheatsheet.
You may also check out this article from FreeCodeCamp.
Hands-on resources 📒
Following are some hands-on resources that will help you make your git and GitHub skills stronger.
GitHub's interactive courses that are designed for beginners and experts:- skills.github.com
Kunal Kushwaha Git Tutorial :- youtu.be/apGV9Kg7ics
GitHub Actions Tutorial:- youtu.be/R8_veQiYBjI
Git For Professionals:- youtu.be/Uszj_k0DGsg
Do's ✅ & Dont's ❎ While Making Contributions
I'd love to share some tips and hacks with you that helped me personally to level up my Open Source journey.
- Before contributing to the project, you should first go through the
CONTRIBUTING.mdandCODE_OF_CONDUCT.mdfiles. Both of these files contain contributing guidelines and code of conduct rules for the project which you should follow. - Find a new feature/bug/docs fixes first and during this process, you should take a look at the existing Issues and Pull Requests once. In this way, you may find some issues that have not been fixed/taken up by someone which you may take up to solve it.
- Always create issues and let the maintainers know about the feature or bug fix you wanna make in the project and get assigned first before making any pull request(PRs).
- You should behold your patience. If you have made an issue today morning, then wait for 2-3 more days to get assigned by the maintainers of the project. If you have created a PR today then you should have at least wait for 10 days to get reviewed and merged.
- If the project you're contributing to, doesn't have active maintainers for more than a week after you created an issue, then I'd recommend not contributing to that project and moving to a new one.
- It's always better to get in touch with the maintainers of the project you're contributing to via their socials. This will help your contribution to get reviewed and merged faster in that project and this also shows that you're eager to help the maintainer of the project in improving it.
While you can always ask for help, you should not disturb the maintainers by messaging them repeatedly at once. I believe all have their respective work in their personal lives or they might be ill. So, you have to work on keeping things in mind.
A famous quote by me:
"More green squares 🟩 = More Open Source = More GitHub contributions"
This is okay but don't go crazy behind it because apart from these you might also be having your work and studies and you need to focus on them too. 😊
Benefits of Contributing To Open Source Projects
- You come across various developers all over the world.
- Helps you make your profile stronger
- Creates an eagerness to learn a new tech stack or a programming language and contribute to a new project.
- Gives you exposure to the tech world and leverages your profile.
Open Source Programs
Open Source Programs are the best practices to join in and connect with various folks and project maintainers while contributing to different projects and leveraging up the GitHub contribution graph. Some open source program offers swags to the top contributors and certificates for all. There are also some Open Source programs like Google Summer of Code(GSoC) that provides stipend.
Some of them are listed below.
- Google Summer of Code(GSoC)
- GirlScript Summer of Code(GSSoC)
- GirlScript Winter of Code(GWoC)
- Hacktoberfest
- Social Summer of Code(SSoC)
- Social Winter of Code(SWoC)
Alternatively you may check out this blog on "25+ Paid Open Source Programs and Internships" by Karuna Tata.
Open Source Communities
Communities are a great way to get into Open Source, collaborate and learn with each other. Following are some of the list of Open Source communities on Discord that will help you level up your Open Source journey and career.
That's all for today. Hope all went well and you enjoyed the article.
Don't forget that each and every contribution matters neither less of being small or big, code or low-code or documentation fixes. More powers to you. 💪
Hope this helps you. Thank you for reading, and let's connect!
Thank you for reading my blog. Feel free to subscribe to my YouTube Channel and connect on LinkedIn or Twitter. Also, feel free to support my work.😊